How to screen record on an iPhone or iPad
Want to show your non-tech-savvy relative how to do something without having to do it all for them? We detail how to screen record on an iPhone or iPad. …
Do your parents or friends constantly call you, asking how to do something on their iPhone? Or maybe you want to record a sweet Fortnite win that people just have to see? Since iOS 11, Apple introduced a native option to record the screen on iPhone, iPad, and iPod.
What once required a third-party app is now a stunningly simple process. For anyone who just needs basic functionality to record their screen, Apple’s built-in feature should suffice. Just a few taps, and you can share any video through any of your channels.
Setting up screen recording
Although screen recording is easy, you do need to make the setting available in the Control Center.
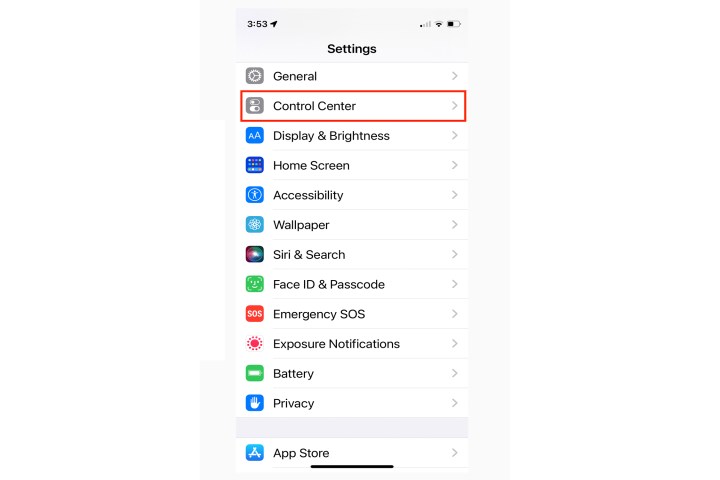
Step 1: To enable screen recording, go to Settings > Control Center.
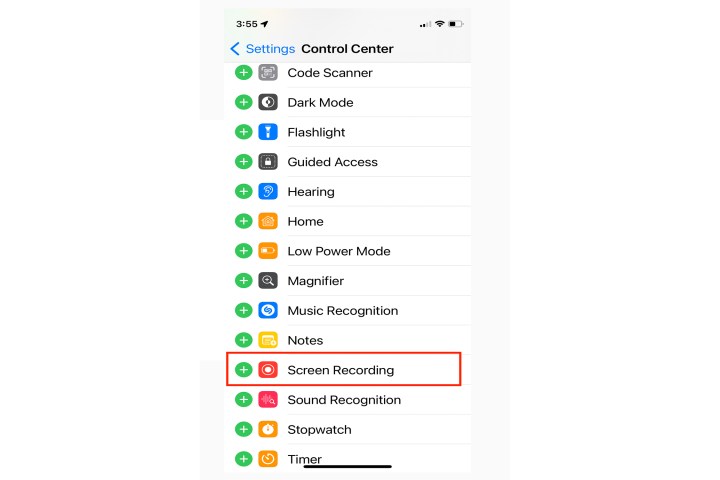
Step 2: Scroll down to the More controls section to find Screen recording and tap the green Plus icon (+) next to it.
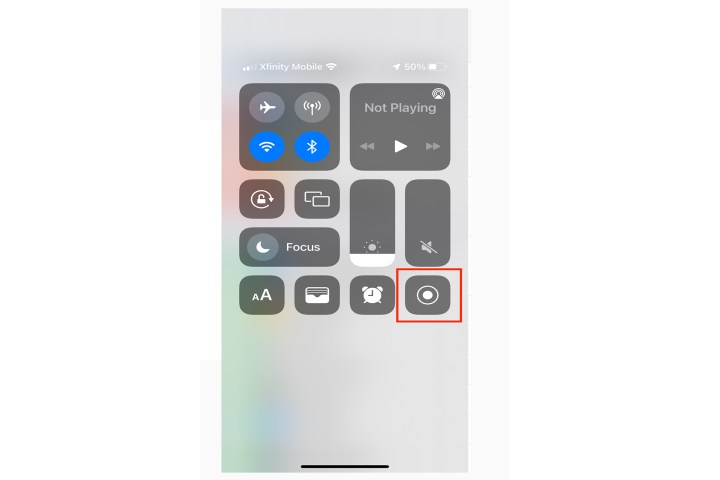
Step 3: A Screen record icon should now appear in the Control center, which you can access by swiping up from the bottom of the screen, or swiping down from the top right edge if you’re on an iPhone or iPad that doesn’t have a Home button, like the iPad Pro and iPhone 14.
Recording your screen
Apple has made screen recording simple.
Step 1: Open the Control Center and tap the Screen record icon.

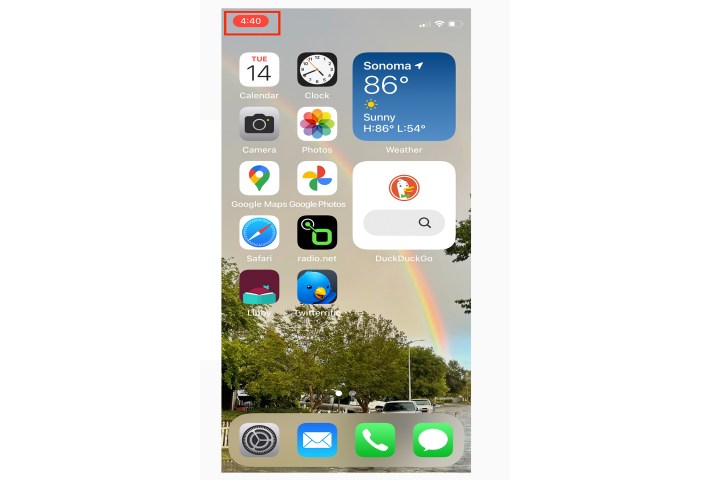
Step 2: Once you tap it, you’ll have three seconds to close the Control Center before your phone starts recording. A red bar will appear at the top of your screen to let you know you’re recording.
Step 3: If you want to add audio to your screen recording, tap the Screen record icon with extra pressure (3D Touch) for more options. A pop-up menu appears in the middle of the screen.
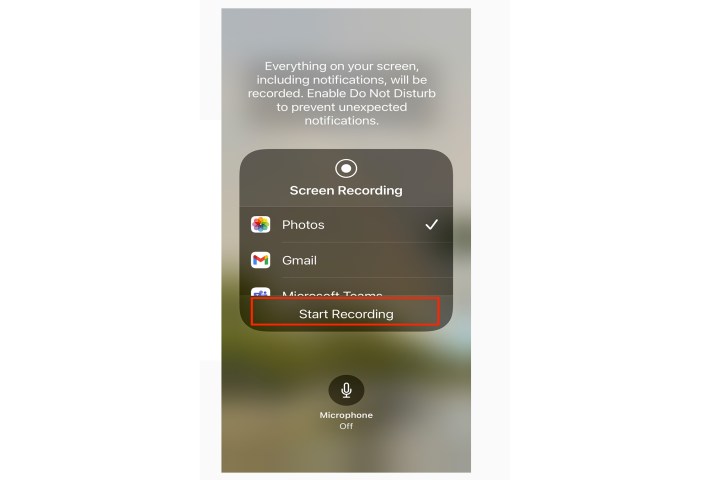
Step 4: Tap the Microphone audio icon, followed by the Start recording button to get going.
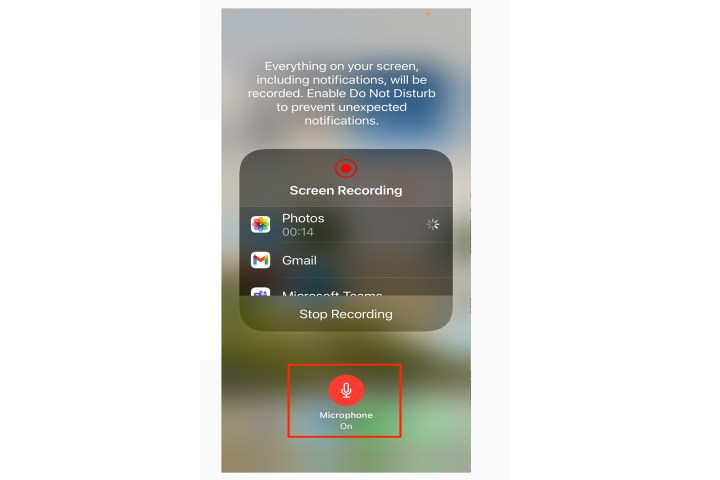
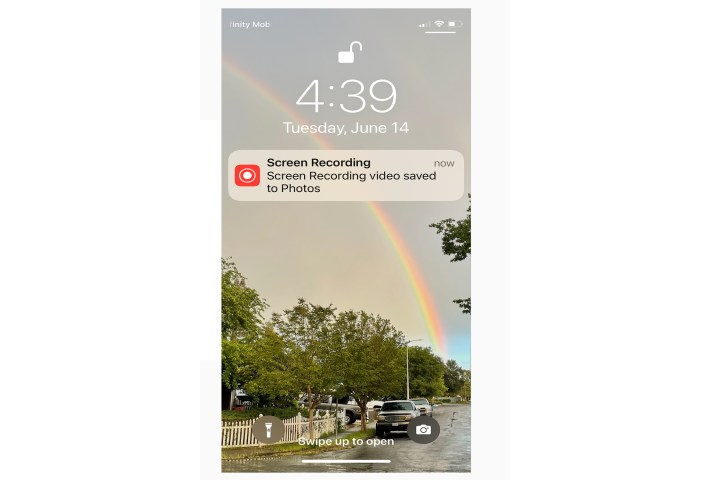
Step 5: When you are finished recording, the fastest way to stop recording is to tap on the red timer on the top of the screen. You’ll see the message Screen recording video saved to Photos appear in your Notification Center, and you can tap on it to enter the Photos app to watch your video. You can also go to the Control Center and tap on the Screen record icon to stop recording.
Editing a screen recording
After you finish recording your screen, the app will automatically save the video to your phone’s Photos app. You’ll see the message Screen recording video saved to Photos in the notification bar.
Step 1: Tap on this notification to open the video. Or, you can open the recording via the Photos app to edit.
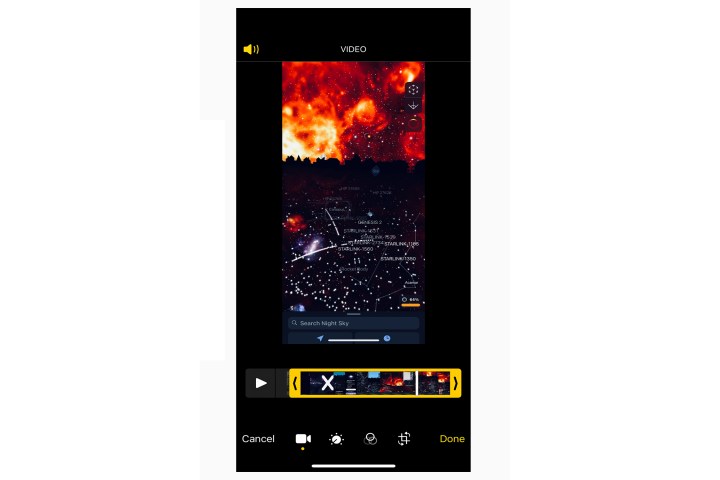
Step 2: Editing a screen recording is just like editing any other video in the Photos app. Open the video in Photos and select Edit in the upper-right-hand corner.

Step 3: A slider bar will appear below the screen recording. At either end of the slider are toggle bars that allow you to edit frame by frame. Simply drag the toggle bars to make adjustments to the beginning or end of your screen recording.
Step 4: When you are satisfied with your editing and don’t want to change anything else, simply tap Done.

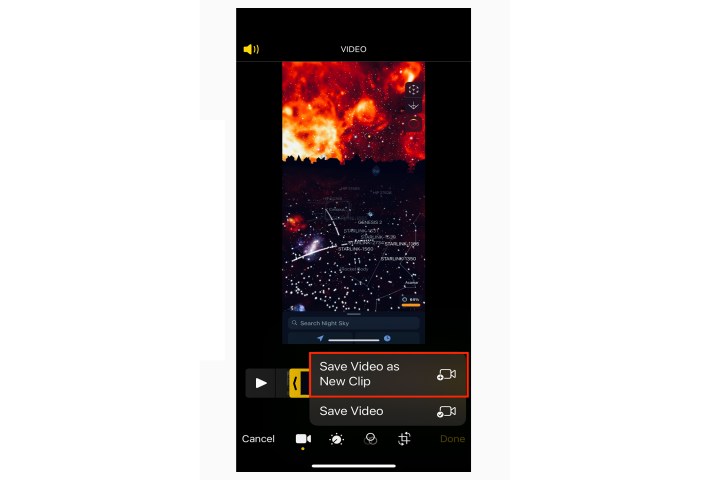
Step 5: Save your work! Tap Save as new clip before navigating away from the editing screen.
When you are finished, you can save your edits, return to your file, and choose the Share button with the upward-pointing arrow to email the clip, send it on a messaging app, and upload it in a variety of different ways depending on your preferences.
If your built-in screen recorder isn’t doing enough, plenty of third-party apps like Go Record: Screen Recorder, ApowerREC: Record Screen, and Screen Recorder, Screen Capture — available on the App Store — offer additional functionality.
Since Apple’s screen recording features are pretty basic, apps like this are a great alternative.
Editors’ Recommendations